
December 27, 2017
From a previous session, I had addressed the delimitation in the cockpit sole...or at least I thought I had. Recent work had required a fair bit of time working in and around the cockpit, and as a result I began to notice some flex in the sole. Upon further inspection, I did get some flex in the aft-third of the sole. Being a rather straightforward and simple procedure, I decided to open up the top skin and remove what I imagined was saturated core material. My intent today was to sand the poop deck over-drilled sections for the hardware fasteners and then top off those areas with a second skim coat of fairing filler, but getting the cockpit structure right took priority.
I drew my cut lines in the area that was presenting the flex, and accompanied noise.

Using the oscillating tool, I cut through the top skin with care not to penetrate the bottom skin. At this point, I was surprised by the determination with which the top skin wanted to remain in situ. While there were clearly two fairly good sized areas that were saturated, for the most part the core material was intact and dry. I continued removal of the top skin and core material, and then further inspected the area for the source of the flex. With gentle pressure, I pressed down on the cockpit sole outboard of the cut line and to the port side. Moving up and down the longitudinal cut line, I repeated this careful examination of the cockpit sole.

I was getting the same flex and noise response as I had been getting while shifting my weight on the uncut cockpit sole. Ducking my head into the port side seat locker, I could clearly see the longitudinal stringer used to support the cockpit sole - there is one to starboard as well. I also could see that the sole was bedded onto the stringer with what I can only imagine to be some polyester-based compound - now rock-hard. I deduced what was happening to the sole, given the fact that the core material was not so far gone as to be causing the flex and noise, and that I was still getting the flex and noise after removing the core material. The issue was the port side of the cockpit sole was not being fully supported by the stringer, and that the gap-filling polyester bedding compound was either scarce or deteriorating in this area. Since the repair area was in the aft section of the space between the bottom skin of the cockpit sole and the molded interior liner, there was no way possible to get a visual on the cockpit sole-to-stringer relationship. I decided to drill a few inspection holes directly over the stringer. With this done and my course to correct the issue decided, I drilled subsequent pilot holes into the inspection holes, and then drove silicon bronze fasteners through the bottom skin and into the stringer below. The flexing of the cockpit sole and associated noise was resolved. ...on with recoring the sole. Before leaving the boat for additional tools and material, I ground a taper into the perimeter of the cockpit sole work surfaces.

Using a sheet of thick-mil plastic, I made templates for two layers of 1708 biaxial cloth.

For the core template, I used the same piece of plastic and created the balsa core template.

Working from the outer most layer of cloth and through to the smaller layer and finally the balsa core material, I removed the new materials for the core replacement process.

With the new materials sized and cut, I started by wetting the surfaces with epoxy.

I then came back with a small batch of epoxy thickened with 407 low-density and 406 colloidal silica, and both troweled the epoxy onto the bottom skin with a squeegee that I had cut notches into, as well as having pushed it into the voids around the perimeter between the top and bottom skins.

I returned to the shop for the 1708 cloth, carried them to the boat and wet them out in place. I rolled the fiberglass out with a fin roller to remove any residual air bubbles.

Finally, onto the brightwork. I will come back tomorrow for a light sanding of the core replacement and application of fairing compound, but most of the balance of the week will be dedicated to brightwork. I placed the 'rough' cut starboard coaming in place, reviewed areas that needed fine-tuning and then began to slowly remove material. The fitting process is one of placing the piece in position, noting the highland proud spots, taking the piece off, and then removing those spots. And repeating this process a good number of times.

I achieved a good fit on the starboard coaming, and with darkness setting in returned to the shop for some additional tuning on the coaming board.

I set the starboard coaming into the bench vice, and with a small block plane removed the wavy lines of the jig saw's rough cut. There will be some additional material removal on both the forward and aft ends of the coaming board where it comes into contact with the deck. For now, I need to move on to other pieces.

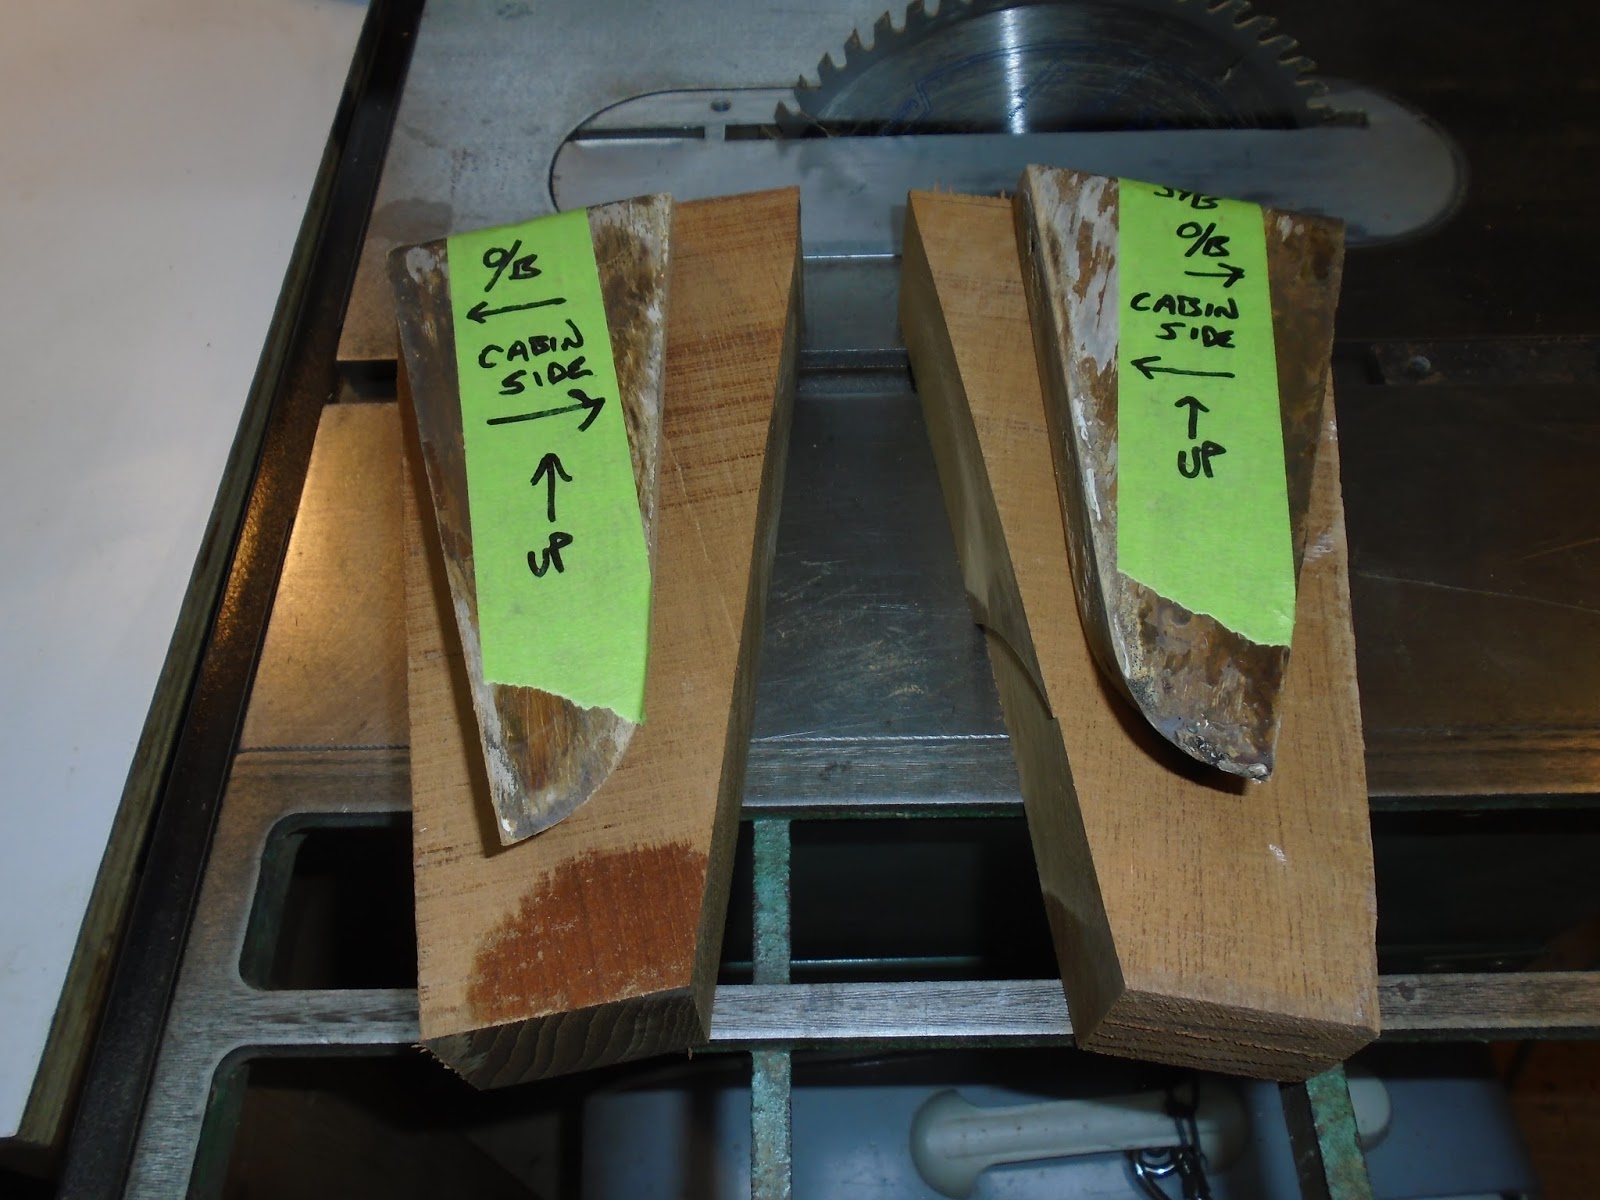
I removed the original (or old) coaming blocks from the original boards, and labeled them for identification and orientation for further patterning use. I grabbed a 10/4 piece of teak I had in inventory and removed from it a couple pieces that would eventually become the new coaming blocks. I began to layout the starboard block, but did not get too far before closing the shop for the day.
Total Time Today: 6 hrs
No comments:
Post a Comment