
October 7, 2017
Rested and relaxed from vacation, I was eager to get back on the restoration of Joule. She faired well in my absence - having covered all recent epoxy work from the harmful UV rays.
I started with addressing the disgraceful holes bored into Joule's counter in order to mount the hideous motor bracket - there's a time and place for these spring-loaded motor brackets, and on the counter of a sweet little Typhoon is NOT the place...at any time! I counter bored the fastener holes some time ago, as can be seen below.
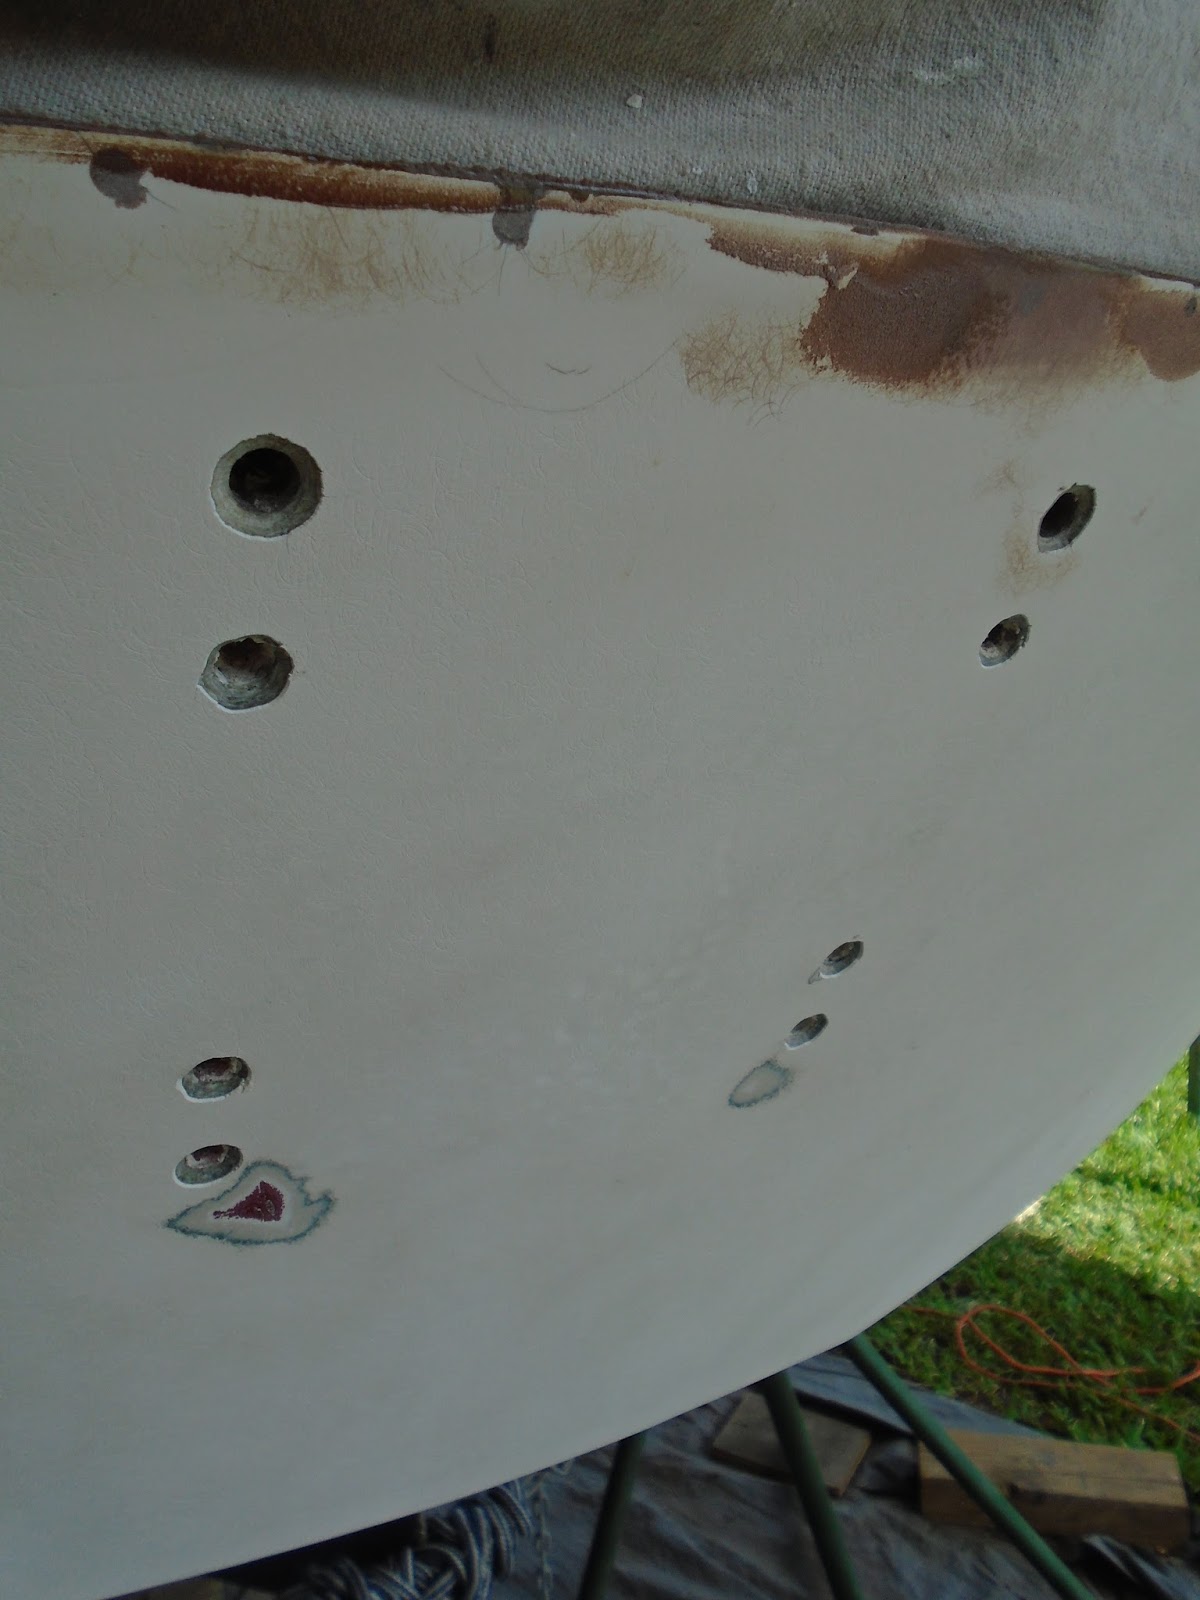
With the size of the fastener holes being what they are, I decide to dish-out the holes a bit to create more of a bonding surface for the fairing filler. Using a 40-grit flap wheel on the angle grinder, I made quick work of "opening up" the surface area a bit.

At this point, I vacuumed the entire boat - having spend the previous three and a half hours sanding. Next, I solvent washed all of the areas I would be addressing with additional filling material. After I had cleaned all contaminates from the work surfaces, I then applied epoxy to the areas that required more fill work. I started with wetting out the counter - those hideous motor bracket holes. I have seen this before in CD Typhoons...these motor brackets often hold a ~15 HP engine, and the weight of the engine requires a motor bracket of decent size. This bracket held no less that eight bolts - I believe they were 1/4" in size. The cranking down (tightening) of these bolts, over time, deforms the counter, so additional fairing work is required to bring the surface back to fair.
My first application was straight 406 silica applied to the fastener holes themselves.

I then applied a thin coat of 406 silica and 407 low-density fairing filler to the surface. I will come back to fair this area with the surrounding surfaces.

The picture below is of the poop deck after being sanded, and now with a coat of "neat" epoxy applied - epoxy that is not thickened.

I then came back with a 10" trowel and filled the low spots, creating a relative uniform surface that will then require final sanding and fairing.

I did the same task to the portions of the cockpit that required attention: port side coaming fastener holes, cockpit seating gouges and ships, and the cockpit soles itself - requiring record work in certain parts.

After wetting those surfaces out, I cam back with the 10" trowel to move slowly towards a faired surface,

While I was addressing (fairing) the work that I had created, I also took the time to fill the previous damage repairs. The fairing compound used was exhibiting holed and voids in its surface, but soon these would be filled and faired.

Continuing my way around $11044, I addressed those areas that appeared to be questionable.

I signed off for the day, with a quick couple applications to the bow of the shit.

Total Time Today: 5 hrs