This blog will document the restoration of Cape Dory Typhoon (Weekender) Hull #1044. The Cape Dory Typhoon is a great sailing small-scale 'yacht', and offers a very friendly experience for her captain and crew. The scope of this restoration project will be painting the interior, deck and topsides, as well as fabricating new teak brightwork.

Friday, December 29, 2017

A Brightwork Day


December 29, 2017


Given the cold weather that came in, I was hesitant about attempting to sand the previous day's fairing work on the cockpit sole.  I wanted to give the epoxy more time to fully sure, or at least be sure that the epoxy had enough time before proceeding.  So because of the weather impeding certain tasks, I decided to make it a brightwork day.   My first intention was to start on the vertical companionway hatch trim.  I took the pieces over to Joule and began to review for further shaping and installation options.  I soon came to the conclusion that I needed the slide hatch itself in place, as well as the longitudinal hatch trim, in order to get the angles and measures required for the vertical pieces.  Having the hatch in place would require reattaching the hatch trim, but while I was at it, I decided to go ahead and fabricate the push piece attached to the underside of the hatch.  

Using the old piece as a template, I transferred the rough shape onto a new piece of teak stock, and then began to shape the curve to match that of the old piece as well as the concave underside of the slide hatch.  I achieve the required fair curve, at least for the top portion of the trim where it attaches to the underside of the slide hatch, and then clamped the piece in place to transfer the existing fastener holes.


Since I was still working the top piece of the slide hatch trim, I went ahead and reinstalled the old top piece to the new bottom piece in order to get the final and proper curve and orientation of the slide hatch.  


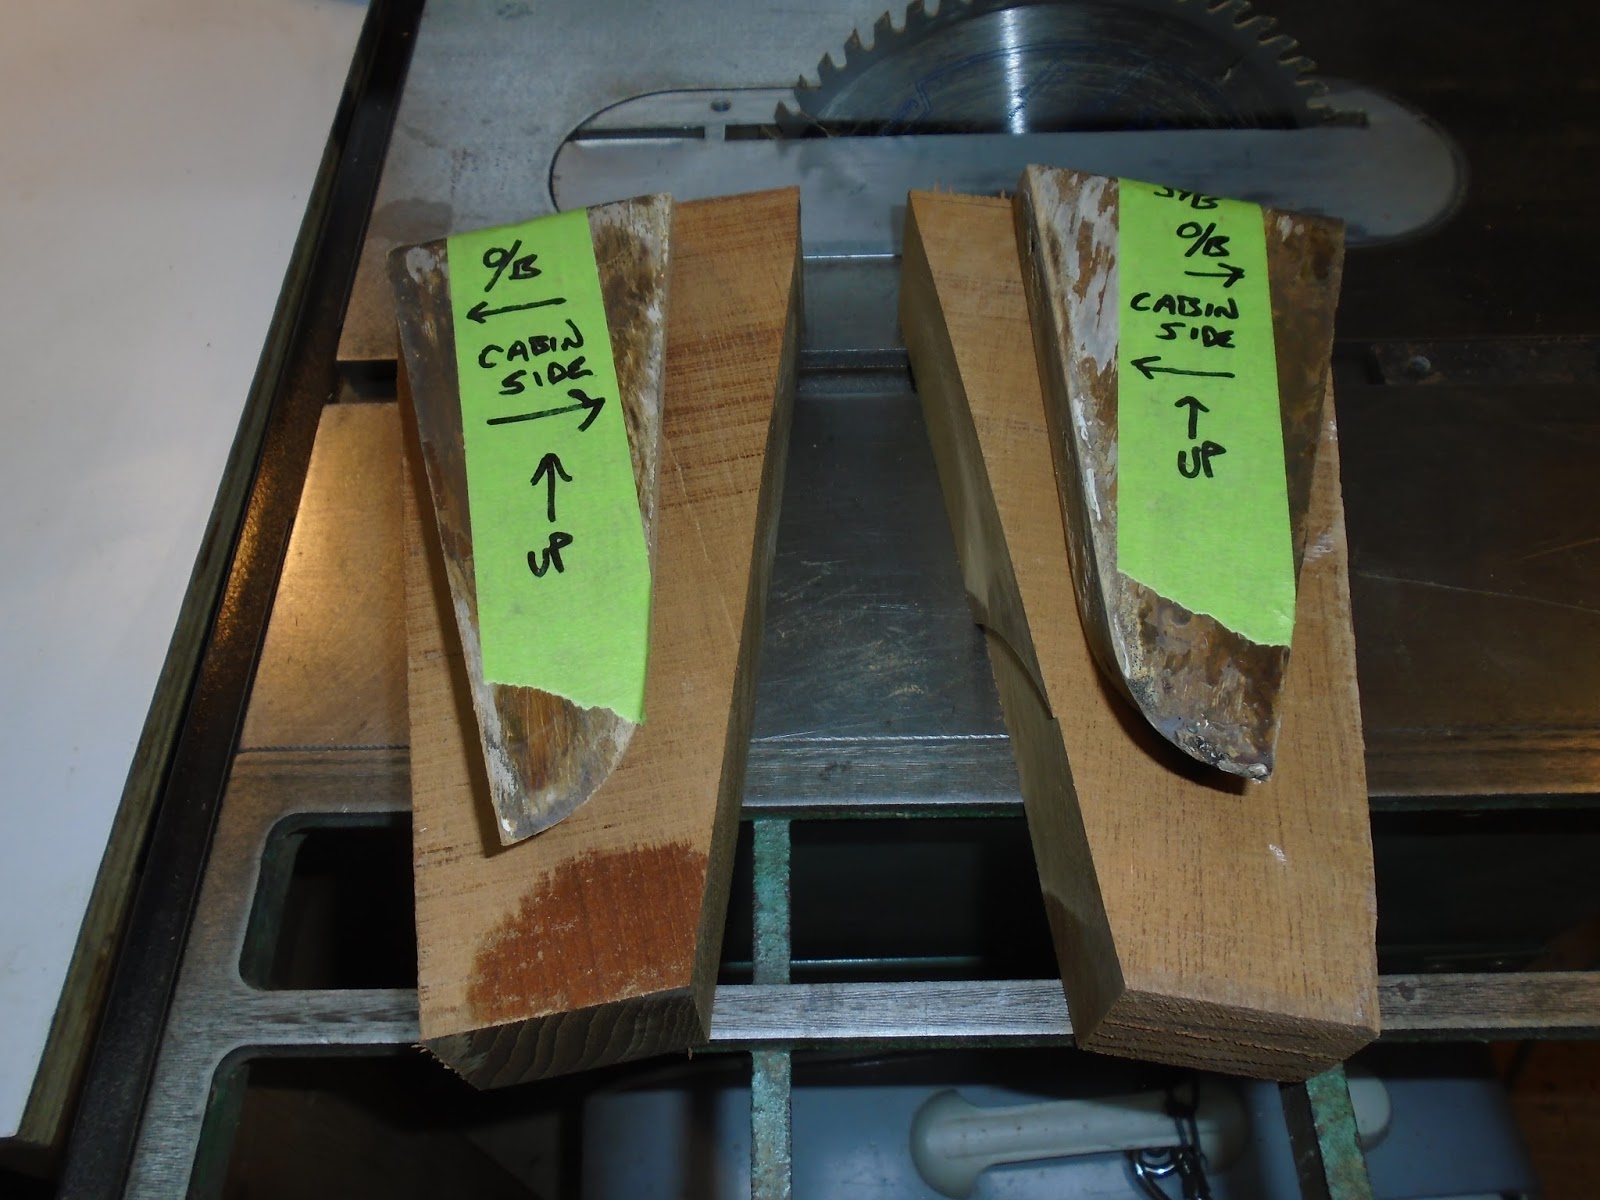
With the slide hatch in place, I again laid out the longitudinal and vertical pieces to note areas needing material removed, to cut the proper angle on the vertical trim where it mates with the longitudinal trim, and to identify where fasteners were needed on the vertical trim. 


I addressed the port side first, and then turned my attention to the starboard piece.


With notes made, I returned to the shop with the trim pieces and cut the new angles, ran the outer edges through the router for the 1/4" round overs, and then marked and drilled the fasteners holes - which will be bunged once the trim is installed.


I will install the vertical trim to get final shaping done on the longitudinal trim pieces.


Reaching the point on the vertical trim where I needed to move on, I decided to pop the slide hatch top trim board back into the steam box in order to place it back onto the form.  I was getting a lot of spring back on this very small piece of trim, so to avoid stress on the piece itself during installation, I decided to adjust the form and over bend it.  Putting more curve in the piece would allow it to stay within tolerance and still have the likely spring back I anticipate.

While the trim was enjoying its steam bath, I moved onto the coaming boards. I wanted to create the 1/4" round overs on all of the exposed edges.  These boards will be constantly used to gain and regain balance, to lean into and grab, and so will need to be friendly to the touch with no harsh edges. 


I ran the pieces over the router table to get that smooth edge transition.


I finished off the coaming boards by sanding the newly formed edges with 150-grit paper; just prior to installation, I will come back with 220-grit to take care of the reaming rough areas and then apply the teak sealer.  My final item for the day was to remove the hatch trim from the steam box and to place it in its adjusted form.  I clamped the piece in place, and most likely will complete it in the next work session.


Total Time Today: 3 hrs

Thursday, December 28, 2017

Continuing Brightwork Fabrication + Cockpit Sole Core Work

December 28, 2017

Well it was just one of those days - not a Florida rain (hard pour and then the sun pops back out), but a bitterly cold drizzle reminiscent of something one would experience on an early winter day in Bremen, Germany.  Just saying.  It took me a late rousing from bed and then a lingering hot soak in the tub before I emerged and took to the cold, damp outdoors.  With the shop opened up however, I got straight to work. 
I picked up where I left off yesterday evening, and began shaping the port coaming block.  I marked curves and angles taken from the original block, transferring onto the new teak.  As much as I can, I am intending to leave the new blocks as thick as possible.  I think the overall new dimensions of the teak coaming blocks improve their appearance in proportion with that of the new coaming boards.


With the port coaming beginning to take shape, I grabbed both blocks (and their original counterparts) and headed over to Joule for some fitting work.  I began with the port coaming.  I worked the inboard side that ultimately gets fastened to the cabin sides, as well as the radius curve that sits in the transition from deck to cabin sides.


After several test fits and time working the new teak coaming block, it began to hug the cabin sides in good form.  For now, I decided to leave the block's height alone.  I plan to dry-fit the port coaming board with fasteners and then address final shaping of the coaming block for a good fit with the coaming board - ditto for the starboard side.


Satisfied with the port coaming block, I turned my attention to the starboard block.  


As I had done with the port side, I made numerous small adjustments to fine tune the placement of the starboard coaming block.


With the blocks taken as far as I dared to, I switched gears back to the coaming boards for additional adjustments on the starboard side and for fitting of the port side.


I placed the rough cut port coaming board in place and took some notes on where I needed to remove larger portions of material.  With mental notes made, I headed back over to the shop to remove the excess material.  As I did with the coaming blocks, I placed the board in position, noted high spots and problem areas, took the board down to the bench at the base of Joule, worked those areas requiring work, and then placed the board back in position...and repeated this process several times.


I arrived at a good fit for the port coaming, with only minor adjustments to be made on the aft portion of the coaming, as well as to plane the bottom edge to a pleasing and fair curve.


Having secured a good fit on the starboard board yesterday evening, I now placed both boards to satisfy my own curiosities :)


She's taking shape!


I wrapped up the brightwork for the day, and got straight at the fiberglass work on Joule's poop deck and cockpit sole.  Earlier in the day, I water-washed the amine blush from the touch up fill work on the poop deck hardware fastener holes, and at the same time washed the previous day's work on the cockpit sole.  Photo below showing sanded fill and fairing work done to the future fastener holes for the poop deck hardware.


With the RO sander and a combination of 40-grit and 80-grit discs, I knocked down the uneven surfaces of the previous day's core replacement.  The new top skin consists of two layers of 1708 biaxial, and had a few proud areas that required some attention prior to applying a coat of fairing compound.  After sanding the surface to prep for the fairing compound, I vacuumed the dust not captured by the RO sander and thoroughly cleaned the surface with solvent.  I had rolled the wet glass out with a fin roller, but for some reason still ended up with an air bubble (center of pic).  I removed the errant glass and would fill the void.


I applied a fairly liberal amount of epoxy thickened with a combination of 407 low-density and 406 colloidal silica.  I will make a pass tomorrow with the RO sander and likely have to apply another skim coat to complete the cockpit sole core replacement.


Total Time Today: 4.5 hrs

Wednesday, December 27, 2017

Cockpit Sole Core Replacement and Continued Brightwork Fabrication


December 27, 2017


From a previous session, I had addressed the delimitation in the cockpit sole...or at least I thought I had.  Recent work had required a fair bit of time working in and around the cockpit, and as a result I began to notice some flex in the sole.  Upon further inspection, I did get some flex in the aft-third of the sole.  Being a rather straightforward and simple procedure, I decided to open up the top skin and remove what I imagined was saturated core material.  My intent today was to sand the poop deck over-drilled sections for the hardware fasteners and then top off those areas with a second skim coat of fairing filler, but getting the cockpit structure right took priority.  

I drew my cut lines in the area that was presenting the flex, and accompanied noise.  


Using the oscillating tool, I cut through the top skin with care not to penetrate the bottom skin.  At this point, I was surprised by the determination with which the top skin wanted to remain in situ.  While there were clearly two fairly good sized areas that were saturated, for the most part the core material was intact and dry.  I continued removal of the top skin and core material, and then further inspected the area for the source of the flex.  With gentle pressure, I pressed down on the cockpit sole outboard of the cut line and to the port side.  Moving up and down the longitudinal cut line, I repeated this careful examination of the cockpit sole.  


I was getting the same flex and noise response as I had been getting while shifting my weight on the uncut cockpit sole.  Ducking my head into the port side seat locker, I could clearly see the longitudinal stringer used to support the cockpit sole - there is one to starboard as well.  I also could see that the sole was bedded onto the stringer with what I can only imagine to be some polyester-based compound - now rock-hard.  I deduced what was happening to the sole, given the fact that the core material was not so far gone as to be causing the flex and noise, and that I was still getting the flex and noise after removing the core material.  The issue was the port side of the cockpit sole was not being fully supported by the stringer, and that the gap-filling polyester bedding compound was either scarce or deteriorating in this area.  Since the repair area was in the aft section of the space between the bottom skin of the cockpit sole and the molded interior liner, there was no way possible to get a visual on the cockpit sole-to-stringer relationship.  I decided to drill a few inspection holes directly over the stringer.  With this done and my course to correct the issue decided, I drilled subsequent pilot holes into the inspection holes, and then drove silicon bronze fasteners through the bottom skin and into the stringer below.  The flexing of the cockpit sole and associated noise was resolved.  ...on with recoring the sole.  Before leaving the boat for additional tools and material, I ground a taper into the perimeter of the cockpit sole work surfaces.


Using a sheet of thick-mil plastic, I made templates for two layers of 1708 biaxial cloth.


For the core template, I used the same piece of plastic and created the balsa core template.


Working from the outer most layer of cloth and through to the smaller layer and finally the balsa core material, I removed the new materials for the core replacement process.


With the new materials sized and cut, I started by wetting the surfaces with epoxy.


I then came back with a small batch of epoxy thickened with 407 low-density and 406 colloidal silica, and both troweled the epoxy onto the bottom skin with a squeegee that I had cut notches into, as well as having pushed it into the voids around the perimeter between the top and bottom skins.


I returned to the shop for the 1708 cloth, carried them to the boat and wet them out in place.  I rolled the fiberglass out with a fin roller to remove any residual air bubbles.


Finally, onto the brightwork.  I will come back tomorrow for a light sanding of the core replacement and application of fairing compound, but most of the balance of the week will be dedicated to brightwork.   I placed the 'rough' cut starboard coaming in place, reviewed areas that needed fine-tuning and then began to slowly remove material.  The fitting process is one of placing the piece in position, noting the highland proud spots, taking the piece off, and then removing those spots.  And repeating this process a good number of times.   


I achieved a good fit on the starboard coaming, and with darkness setting in returned to the shop for some additional tuning on the coaming board.


I set the starboard coaming into the bench vice, and with a small block plane removed the wavy lines of the jig saw's rough cut.  There will be some additional material removal on both the forward and aft ends of the coaming board where it comes into contact with the deck.  For now, I need to move on to other pieces.


I removed the original (or old) coaming blocks from the original boards, and labeled them for identification and orientation for further patterning use.  I grabbed a 10/4 piece of teak I had in inventory and removed from it a couple pieces that would eventually become the new coaming blocks.  I began to layout the starboard block, but did not get too far before closing the shop for the day. 


Total Time Today: 6 hrs