This blog will document the restoration of Cape Dory Typhoon (Weekender) Hull #1044. The Cape Dory Typhoon is a great sailing small-scale 'yacht', and offers a very friendly experience for her captain and crew. The scope of this restoration project will be painting the interior, deck and topsides, as well as fabricating new teak brightwork.

Wednesday, October 25, 2017

Continued Work on Hatches + Companionway Hatch (Part 2)

October 24, 2017


I could not resist getting back out to continue work on the cockpit seat locker hatches, and so I took the opportunity to do so.  I began by water-washing the previous application of the 6oz cloth, and then sanded the surface down with 80-grit paper using the RO sander.  I had applied some additional fairing compound to the inside corners in an effort to create a smooth transition and add strength; I would sand those areas at a later time.


I then vacuumed the surfaces and wiped them down with a solvent to thoroughly clean them prior to wetting out with straight epoxy.


The picture below shows the hatches / locker lids primed with epoxy prior to their final application of fairing compound.  While I waited for the epoxy to 'tack-up', I turned my attention back to the companionway slide hatch.  After filling the hole with cloth and some fairing compound, the hatch had sufficiently cured to allow me to proceed with the next step.  I water-washed and sanded the top of the hatch, and then prepped it for additional cloth to be laid up.  The cloth that I used was 6o - light material - so I prepared some additional layers of 6oz cloth to apply.  I cut out 4 circles, progressively smaller than the last.  I wiped the surface the patched area with solvent, wet out the glass, and then applied the glass to the hatch.


Now that I had the hatch taken care of, I moved back over the the cockpit hatches.  The surface of both hatches were tacky to the touch, so I moved into mixing up some thickened epoxy for a fairing compound.  I applied the fairing compound and called it a night.  The companionway hatch can just be seen in the right side of the picture.
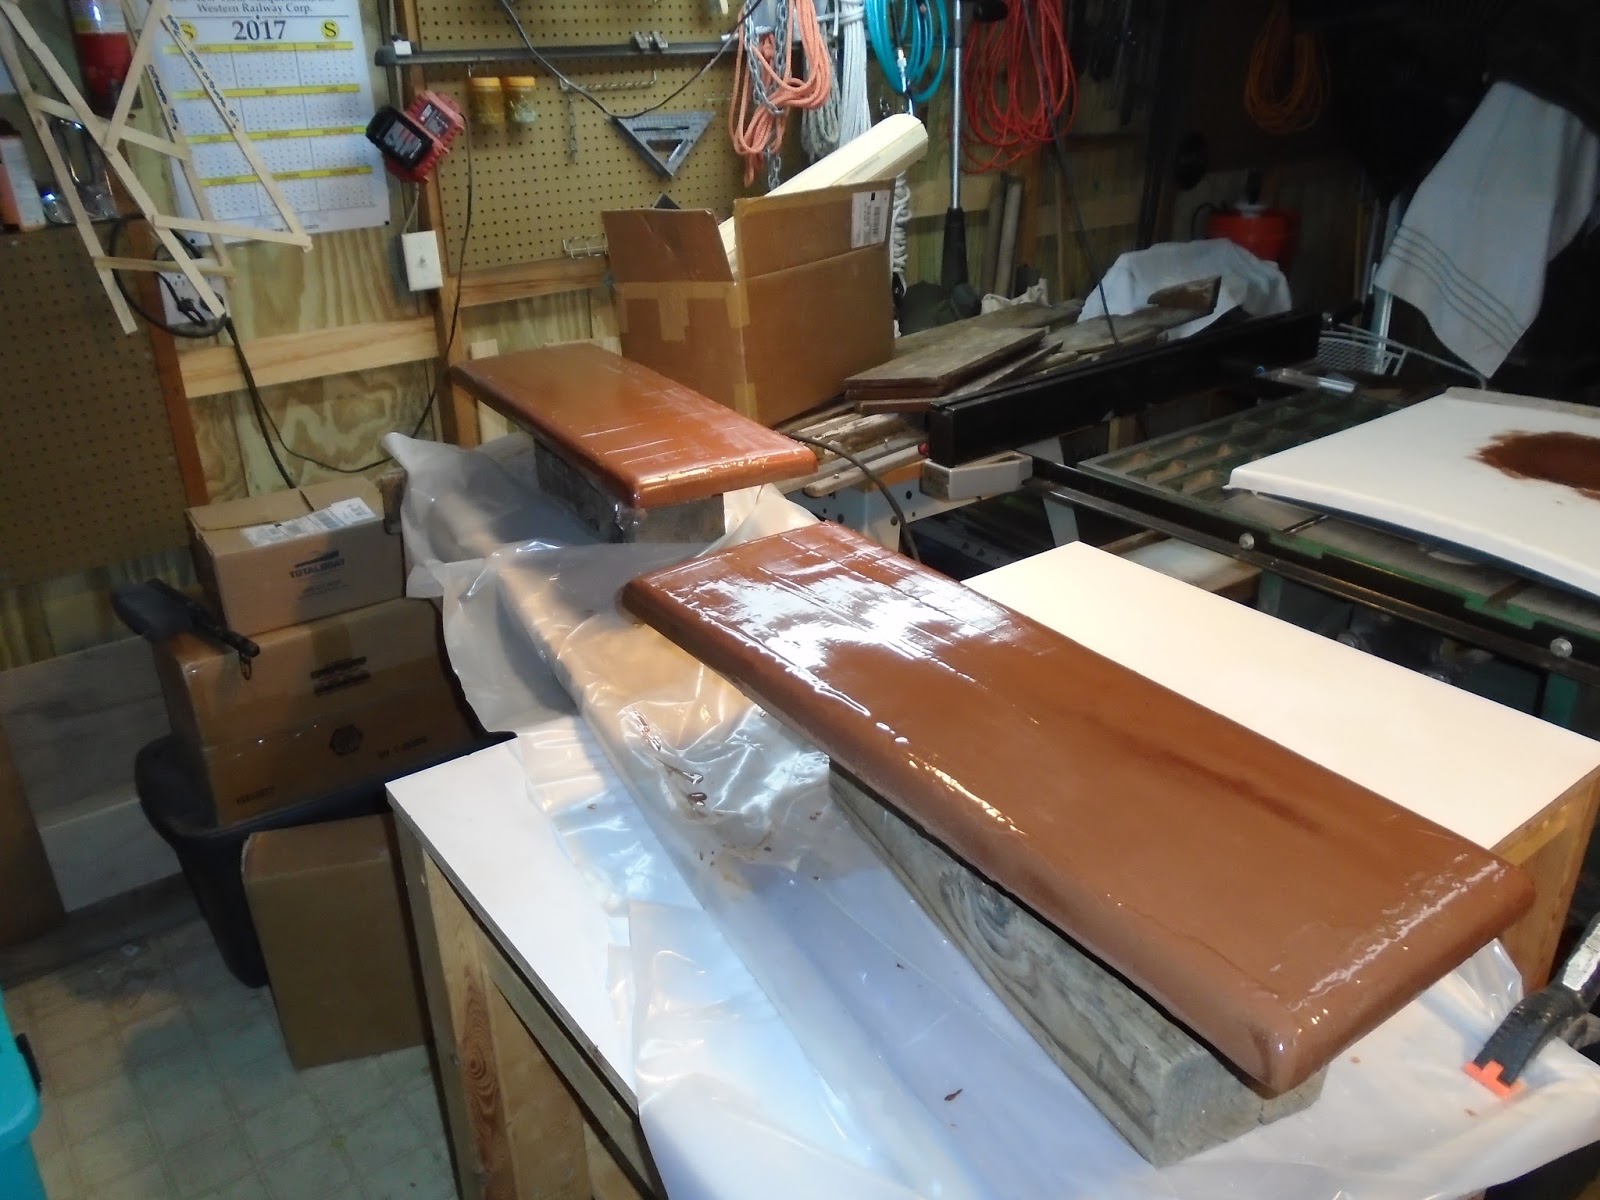


Total Time Today: 2 hrs

Sunday, October 22, 2017

Cont...Work on the Hatches + Filling the Hole in the Companionway Hatch

October 22, 2017


I've made great progress on fabricating the new cockpit seat locker hatches, and was anxious to get back on the work post-breakfast.  I began by water-washing the previous day's work - filling the weave the 1708 biaxial cloth and in general fairing the surface.  I scrubbed the surfaces of both hatches and dried them.  I outfitted myself with 80-grit pads on the ROS sander and began to knock down the high spots.


I sanded as much as I could with the ROS and then finished things off by hand - primarily the inside and outside corners.


The fairing completed with the ROS and by hand, I spot-filled some very small low spots on the top surface, probably small enough that my efforts were not called for, but I went ahead with the filling anyway.  I also filled the inside corners of both hatches - these areas did require some additional fill work.  With that completed, I went ahead and mixed up a batch of epoxy to wet out the top surfaces of both hatches in preparation for another layer of cloth.


In the picture below, the port hatch (background) has the 6oz finish cloth applied and wet out, the starboard hatch (foreground) has the 6oz finish cloth in place ready to saturate with epoxy.  In my next work session I will water-wash, sand and fill the weave with the last bit of fairing work prior to priming the surfaces for topcoat paint.


Not wanting to knock off quite yet, I turned my attention to filling the hole in the companionway slide hatch.  The hole was likely housing a mushroom vent, but now plugged with a piece of teak.  I removed the teak in the prior work session and ground a 12:1 taper to accept new fiberglass.  I used a sheet of plastic to create templates for the new fiberglass.  I choose to use 6oz cloth in this application, so I may need to come back with an additional layer or two.  


I cut out the fiberglass and then solvent-washed the surfaces to prepare for the glass installation.


I quickly worked through wetting out the top surface and applying the fiberglass cloth, so quick in fact that I failed to take a picture of this.  I covered the glass with a sheet of plastic and taped it off.  I then turned the hatch over and applied one disc of cloth in the opening.


Finally, I applied a skim coat of fairing compound across the bottom of the opening to cover the newly laid fiberglass cloth, and then covered this work with a sheet of plastic.  Next steps here would be fill to a fair surface prior to painting.


Total Time Today: 4.75 hrs

Saturday, October 21, 2017

Continued Work on Cockpit Locker Hatches

October 21, 2017


I decided to continue working on the cockpit locker hatches given the progress made on both the starboard and port hatches - it was good to see them begin to take the simple yet familiar shape of the Cape Dory Typhoon seat locker hatch / lid.  I began by removing the cured glass that hung below what would eventually become the bottom dimension of the hatch itself.  I removed this material with an angle grinder and a cut-off wheel.  As a sidebar, and funny story, I had previously been working with an angle grinder on another boat and was tired - having worked several hours through the Florida heat and humidity.  I was working a piece of stubborn material that I needed to remove with one hand and in the other hand I held an angle grinder operating at high rpm.  A quick slip is all it took to introduce palm of left hand to angle grinder in right hand!  I snapped a photo of the wound and sent it over to a OBGYN friend of mine.  His recommendation was, "meet me at my office within the hour," so I closed the shop for the day and headed over to have my wound looked at.  Within a half-hour of arriving, my hand was sewed up in excellent fashion with a few stitches - I like to say that I've had an episiotomy performed on my hand.  I understand now why the delicate and precise hands of an OBGYN are required and differ from some other specialists.  One particular pre-cancerous area removed by my Dermatologist resembles more so a Captain Jack Sparrow-type scar than what is possible by a well-trained hand working the intimates of the female of the species.  Alas, I have the potential for a great story....similar to the scene in the galley of Orca on the first Jaws film! 


With the superfluity of material removed by the cut-off wheel, I switched to a flap wheel (40-grit sanding pad attached to the angle grinder), and proceeded to draw the dimension of the fiberglass in line with the dimension of the mold / template.


After removing that excess material and separating the molds from the cured fiberglass, I could not resist a test fit of the hatches...okay! I have something I can work with here!


The port-side cockpit seat locker hatch...


...and the starboard-side cockpit seat locker hatch.


After taking a few minutes to feel good about myself, I proceeded to water-wash the surface of the hatches and then sand them down with 80-grit paper to prepare the surface for the next steps.  I vacuumed the sanding residue and solvent-washed the surfaces.  I then painted out the underside outside perimeter and the entire top surface of both hatches, and then proceeded to apply thickened epoxy as a fairing compound to those same surfaces.  The next step will be to water-wash and sand, and then finish by laying a 6oz cloth across the top surfaces.  I will then fill and fair the weave of the 6oz cloth, while also glassing in supports from beneath.  More to come!


I took time also today to begin to address the hole in the companion hatch - the slide hatch.  I measured the laminate thickness to determine the measurement required for filling the hole with a fiberglass patch, as determined by the 12:1 ratio.  The hatch thickness was laid up to 1/8", and so using the 12:1 ratio, this meant I had to create a bevel of 1.5" around the circumference of the hole to be filled.  


The result for the top of the hatch...


...and for the underside of the hatch.  I will likely get started with filling this hole in the next work session.


Total Time Today: 5 hrs