This blog will document the restoration of Cape Dory Typhoon (Weekender) Hull #1044. The Cape Dory Typhoon is a great sailing small-scale 'yacht', and offers a very friendly experience for her captain and crew. The scope of this restoration project will be painting the interior, deck and topsides, as well as fabricating new teak brightwork.

Monday, October 9, 2017

Continued Fair & Fill Work & Cabin Sole Recoring

October 8, 2017


Sunday morning, I resumed work on Joule with the goal of continuing the fairing and fill work on the  recoring work done on the poop deck and cockpit sole, as well the old fastener holes.  On the docket for the day as well was the opening up of the cabin sole.  Given the trampoline-like action of the cabin sole, I knew there was sure to be some work to be done on the core material there.

I started the day with the perfunctory, but necessary, water washing of the previous application of epoxy fairing compound.  Starting from the stern, I worked my way forward with a scouring pad, water and a towel to dry the surfaces.  With the amine blush removed from the cured epoxy, I turned my attention to sanding the previous application of fairing compound.  With the Florida heat still in effect in October, I wanted to take advantage of my energy level early in the day.  I used the ROS and 80-grit pads to knock down the proud surfaces and prepare for the next application.  The sanding (fairing) work is sometimes a mind-numbing experience, made endurable by that Steve Jobs brainchild...the iPod, and in my case the iPod Shuffle.  Slap on some The Mamas & The Papas and watch the low-density fairing compound fly!  :)

So I successfully fought through the mental anguish that is somehow affectionately known as 'fairing' - belying its true identity: waterboarding your wrists and fingers!  ....and then turned my attention to the cabin sole. I opened up a small portion of the sole to see what I was dealing with.  Uh, yeah...we've got some issues here.  Not sure how long water had been trapped in the cabin sole, but long enough to turn the balsa core into a ghost of its former self.


I went ahead and marked off a cut line, which would actually expend a bit further forward.  The line you see dropping into the bilge was an experiment in how to keep the cabin sole from depressing into a convex shape as I would eventually weight the new core material in the curing process.  I looped the line around a piece of 18mm meranti and drew it tight around another piece of ply straddling the companionway.  The experiment proved successful, and will be used while I weight the soon to be installed new core material through its curing phase.  Weighting the surface of the new core material ensures that the bond is even and good across the entire mating surfaces of top of bottom skin and bottom of new core material.


With the best-laid plans laid, I cut out topskin. As mentioned previously, I expanded the topspin removal a bit further forward (not pictured).


What the heck is that!??


I placed a piece of 3/8" balsa core in place to get a sense of what the original installation called for.  This test moved me toward 1/4" Divinycell - purchased today.


I moved as far as I could on the cabin sole recore work, and so it was time to switch hats: fairing and filling.  I vacuumed the recently sanded surfaces and followed that by a solvent-wash to order to remove and lingering contaminates (debris).  For the areas I needed to hit again with the fairing compound, I painted neat epoxy on the surfaces.


With an application of neat epoxy applied to all areas requiring additional fairing, I then mixed a small batch of epoxy with fairing compounds added (406 silica and 407 low-density).  


I moved through each of the areas requiring additional work...


...applying the fairing compound as I went.


I finished up in the cockpit with limited application to the recent coring work...


...and called it a day.


Total Time Today: 5.5 hrs
Saturday, October 7, 2017

Fairing & Fill Work Continued...(1)

October 7, 2017


Rested and relaxed from vacation, I was eager to get back on the restoration of Joule.  She faired well in my absence - having covered all recent epoxy work from the harmful UV rays.

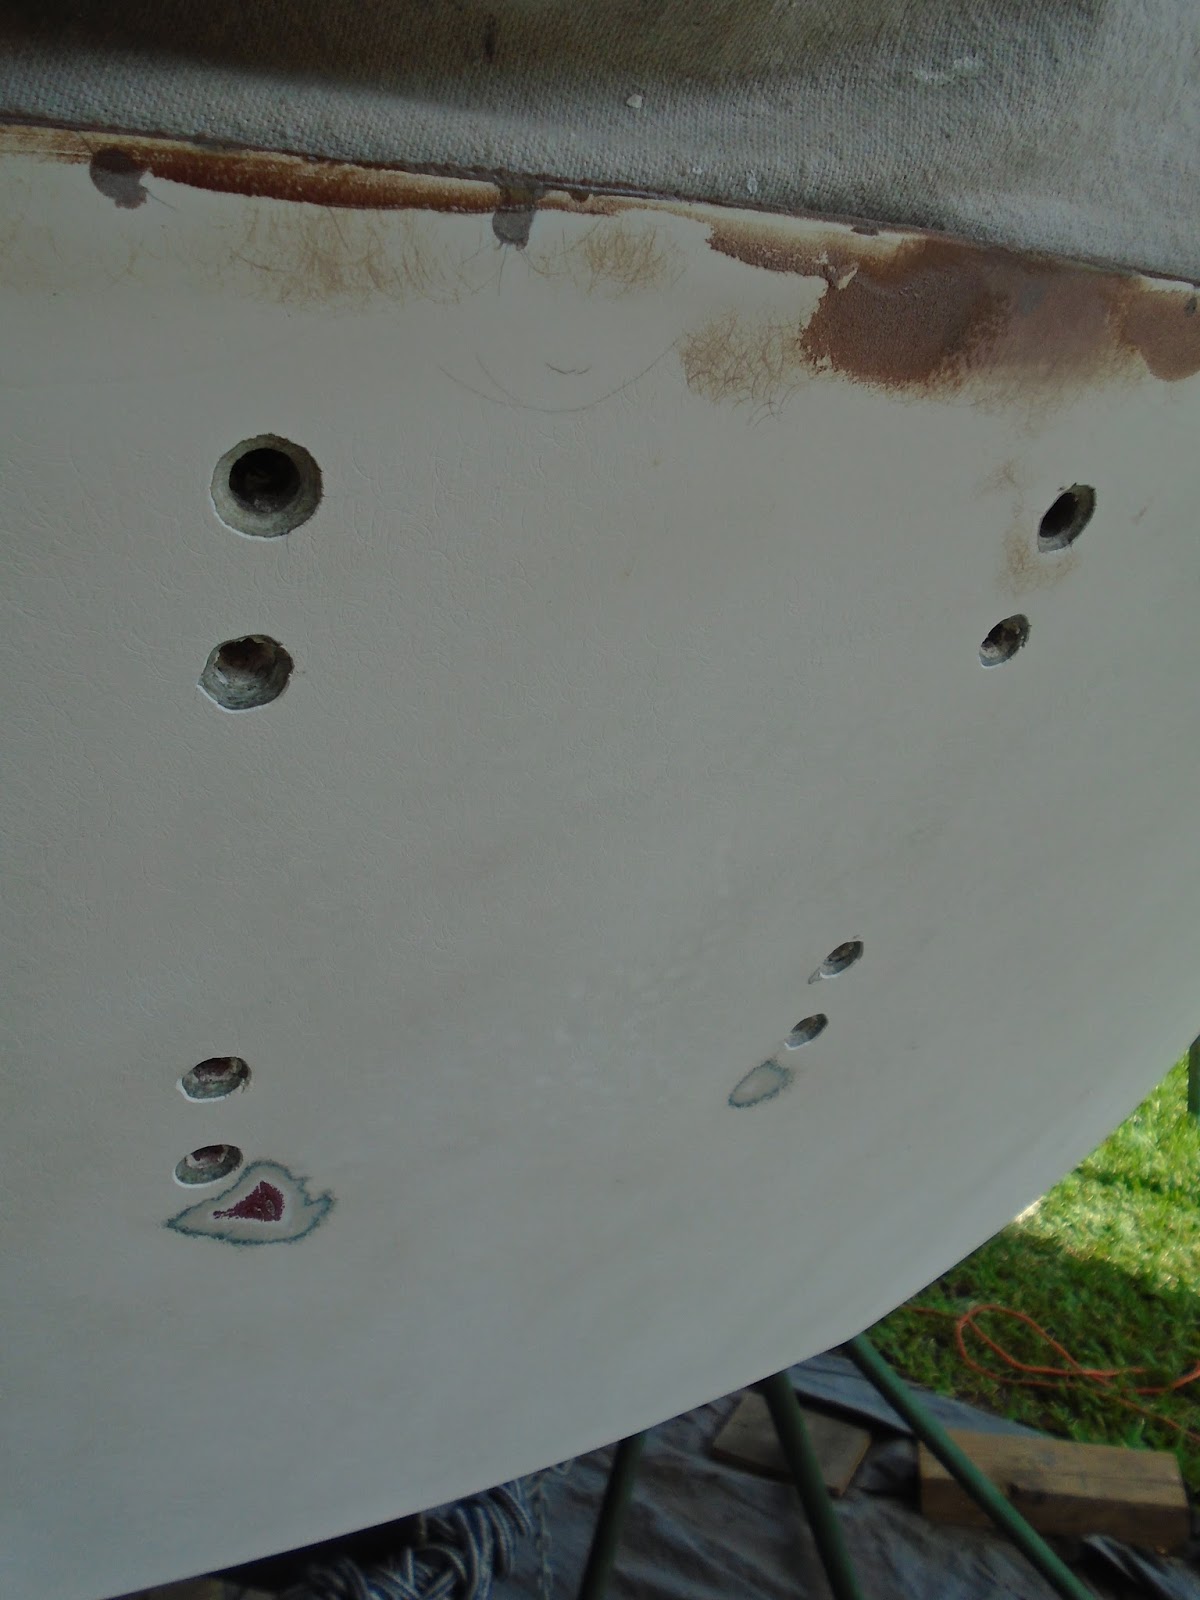
I started with addressing the disgraceful holes bored into Joule's counter in order to mount the hideous motor bracket - there's a time and place for these spring-loaded motor brackets, and on the counter of a sweet little Typhoon is NOT the place...at any time!  I counter bored the fastener holes some time ago, as can be seen below.


With the size of the fastener holes being what they are, I decide to dish-out the holes a bit to create more of a bonding surface for the fairing filler.  Using a 40-grit flap wheel on the angle grinder, I made quick work of "opening up" the surface area a bit.


At this point, I vacuumed the entire boat - having spend the previous three and a half hours sanding.  Next, I solvent washed all of the areas I would be addressing with additional filling material.  After I had cleaned all contaminates from the work surfaces, I then applied epoxy to the areas that required more fill work.  I started with wetting out the counter - those hideous motor bracket holes.  I have seen this before in CD Typhoons...these motor brackets often hold a ~15 HP engine, and the weight of the engine requires a motor bracket of decent size.  This bracket held no less that eight bolts - I believe they were 1/4" in size.  The cranking down (tightening) of these bolts, over time, deforms the counter, so additional fairing work is required to bring the surface back to fair.

My first application was straight 406 silica applied to the fastener holes themselves.


I then applied a thin coat of 406 silica and 407 low-density fairing filler to the surface.  I will come back to fair this area with the surrounding surfaces.


The picture below is of the poop deck after being sanded, and now with a coat of "neat" epoxy applied - epoxy that is not thickened.


I then came back with a 10" trowel and filled the low spots, creating a relative uniform surface that will then require final sanding and fairing.


I did the same task to the portions of the cockpit that required attention: port side coaming fastener holes, cockpit seating gouges and ships, and the cockpit soles itself - requiring record work in certain parts.


After wetting those surfaces out, I cam back with the 10" trowel to move slowly towards a faired surface,


While I was addressing (fairing) the work that I had created, I also took the time to fill the previous damage repairs.  The fairing compound used was exhibiting holed and voids in its surface, but soon these would be filled and faired.


Continuing my way around $11044, I addressed those areas that appeared to be questionable.


I signed off for the day, with a quick couple applications to the bow of the shit.


Total Time Today: 5 hrs

Sunday, September 17, 2017

Fairing The Aft Deck and Cockpit Sole + Spot Filling

September 17, 2016


With a lazy rousing to the day, I eventually made my way from the left side of the bed to the right...kidding, but I did have a leisurely morning and these are needed every so often!   

I started by water-washing the previous day's fairing application in order to remove the amine blush.  I began with the rails (toe and rub), and then worked my way to the aft deck and finally into the cockpit to clean the new coring installation in the sole.

I set up the vac. system on the RO sander and applied 80-grit pads to the surfaces as I worked my way around Joule.


I spent most of my time on the cockpit sole and aft deck; the rails went fairly quickly.


 With today's sanding behind me, I proceeded to clean Joule's deck first by vacuuming as much of the sanding residue as I could.  Next, I solvent-washed the decks to remove any remain sanding residue.

As mentioned in the previous post that described the cockpit sole coring work, I checked the fairness of the one layer of 1708 biaxial cloth to the surrounding area.  As I had initially thought, adding another layer of 1708 would cause the new layup to stand proud of the cockpit sole surfaces surrounding it.  Having determined that one layer of 1708 biaxial would suffice, I moved onto solvent-washing the deck and cockpit in order to prepare for filling with thickened epoxy.  I wet out the surfaces that required filling, and then began to mix small batches of thickened epoxy (406 silica and 407 low-density).  I started with the cockpit sole.


With the cockpit sole getting its first round of fairing compound, I then turned to the cockpit seats.  There were a number of areas of cracking and flaking gelcoat that I bore out with the spiral saw.  These areas were also 'painted' with t neat epoxy and then filled with the fairing compound.  The area requiring the most attention was the aft port-side seat, where the seat transitions to the coaming.


I also re-worked both starboard and port rails.  Shown below, I paid close attention to reforming the starboard deck, around the chain plate.  The deck 'fell-off' outboard in this area, so with a healthy mixture of 406 I was able to bring it back to level with the fore and aft deck surfaces.


There was some additional areas near the starboard that I addressed as well.  The next round of sanding (fairing) should brings the original lines back to these surfaces.


Finally, I addressed the aft deck - poop deck.  I applied the second round of fairing compound and could more easily see the convex surface that would be the eventual result.  It was a day of sanding, mixing epoxy, and applying that thickened epoxy.  More sanding work to come...


Total Time Today: 4.5 hrs